
Commercial Site Selection

The Commercial Site Selection tool in RPR gives commercial real estate practitioners an edge when it comes to finding ideal areas for professional or retail business sites. Here’s a top line of what it can do for you:
- Allows users to select specific attributes from broad data categories such as economic, demographic, spending, tapestry and more.
- With these attributes selected a user can search a large geography such as a county, and identify where these conditions exist in smaller geographies such as ZIP codes or neighborhoods.
- This drilling down allows a user to search for properties only in these geographies that have their desired attributes, ensuring that the core drivers of a client’s business are in the area. Which is a time saver from looking through properties that aren’t.
Set your sites on the right people to support a business
In this article we’ll show you how to explore the RPR Commercial Site Selection feature. To get started from the RPR homepage, select Research and then Commercial Site Selection.
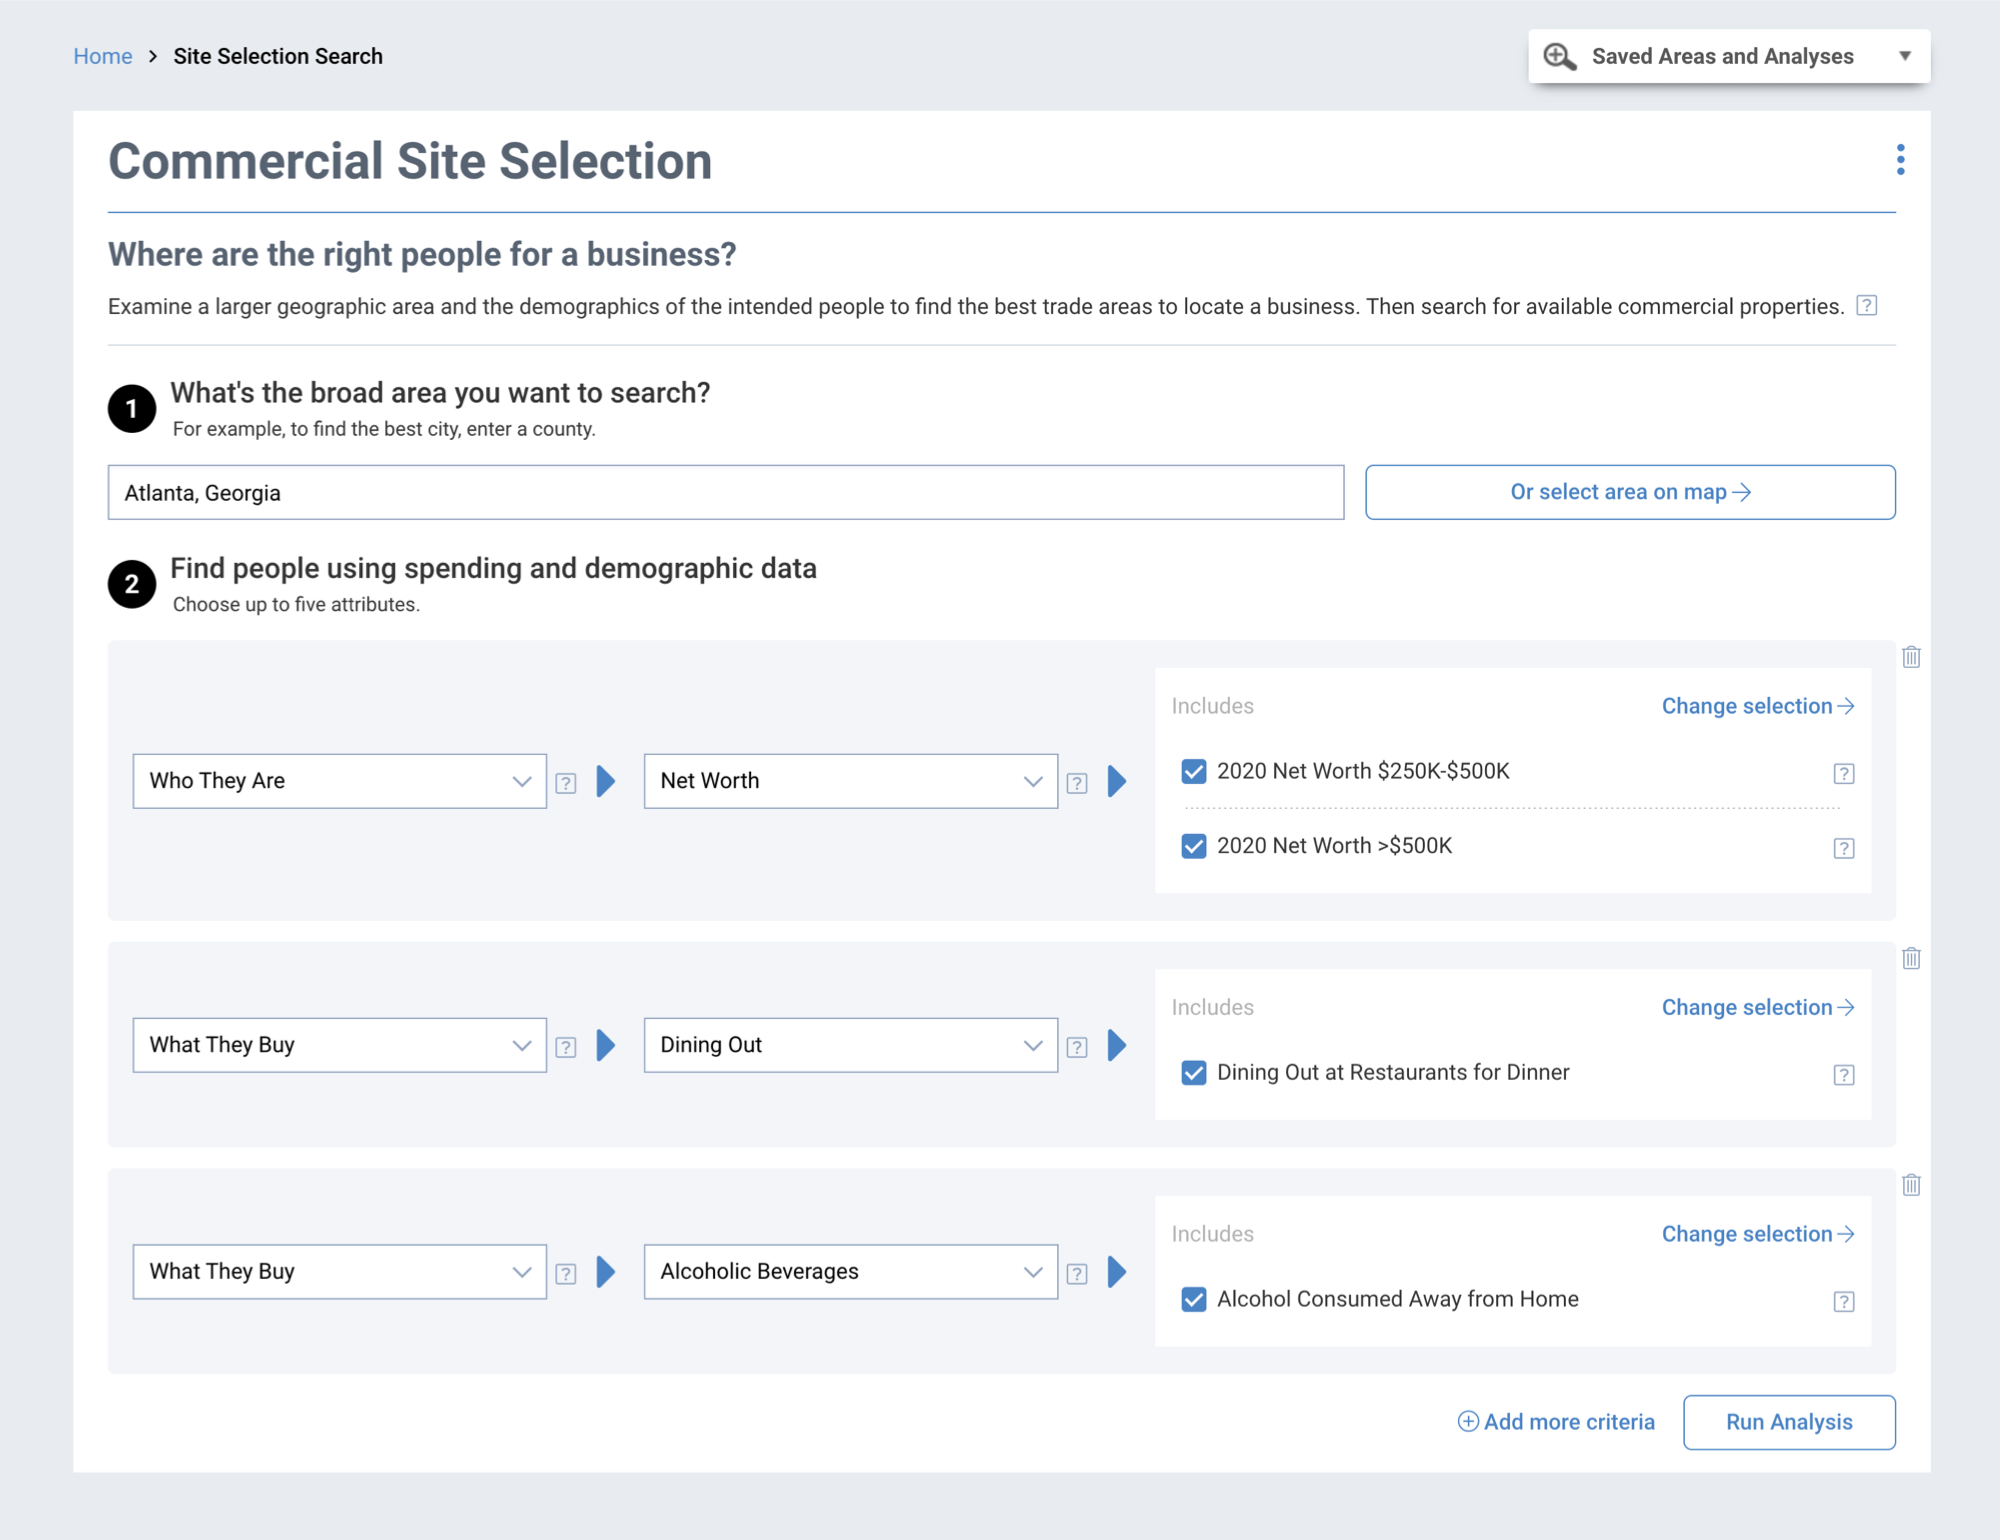
Site Selection asks the question, “Where are the right people for a business?”
Use this analysis to help a client find the best place to search for properties using Esri’s demographic, economic, psychographic and spending data. This will help you to identify the communities and economic conditions that your client(s) want to be around. This tool is useful in all types of commercial site selection efforts from finding a consumer base for a new restaurant to locating the perfect area to invest in a medical office facility.
You’ll start by choosing a broad area to search, such as a city or county or ZIP code. Next you’ll enter the attributes about your desired customer, employee, or renter base and trade area economic conditions.
To narrow down, click Select an Attribute to establish your first attribute. Then fill out the next two dropdown menus. To set another, click Add more criteria and start the process again (you may add up to five attributes).
Run, don’t walk, to optimal trade area matches
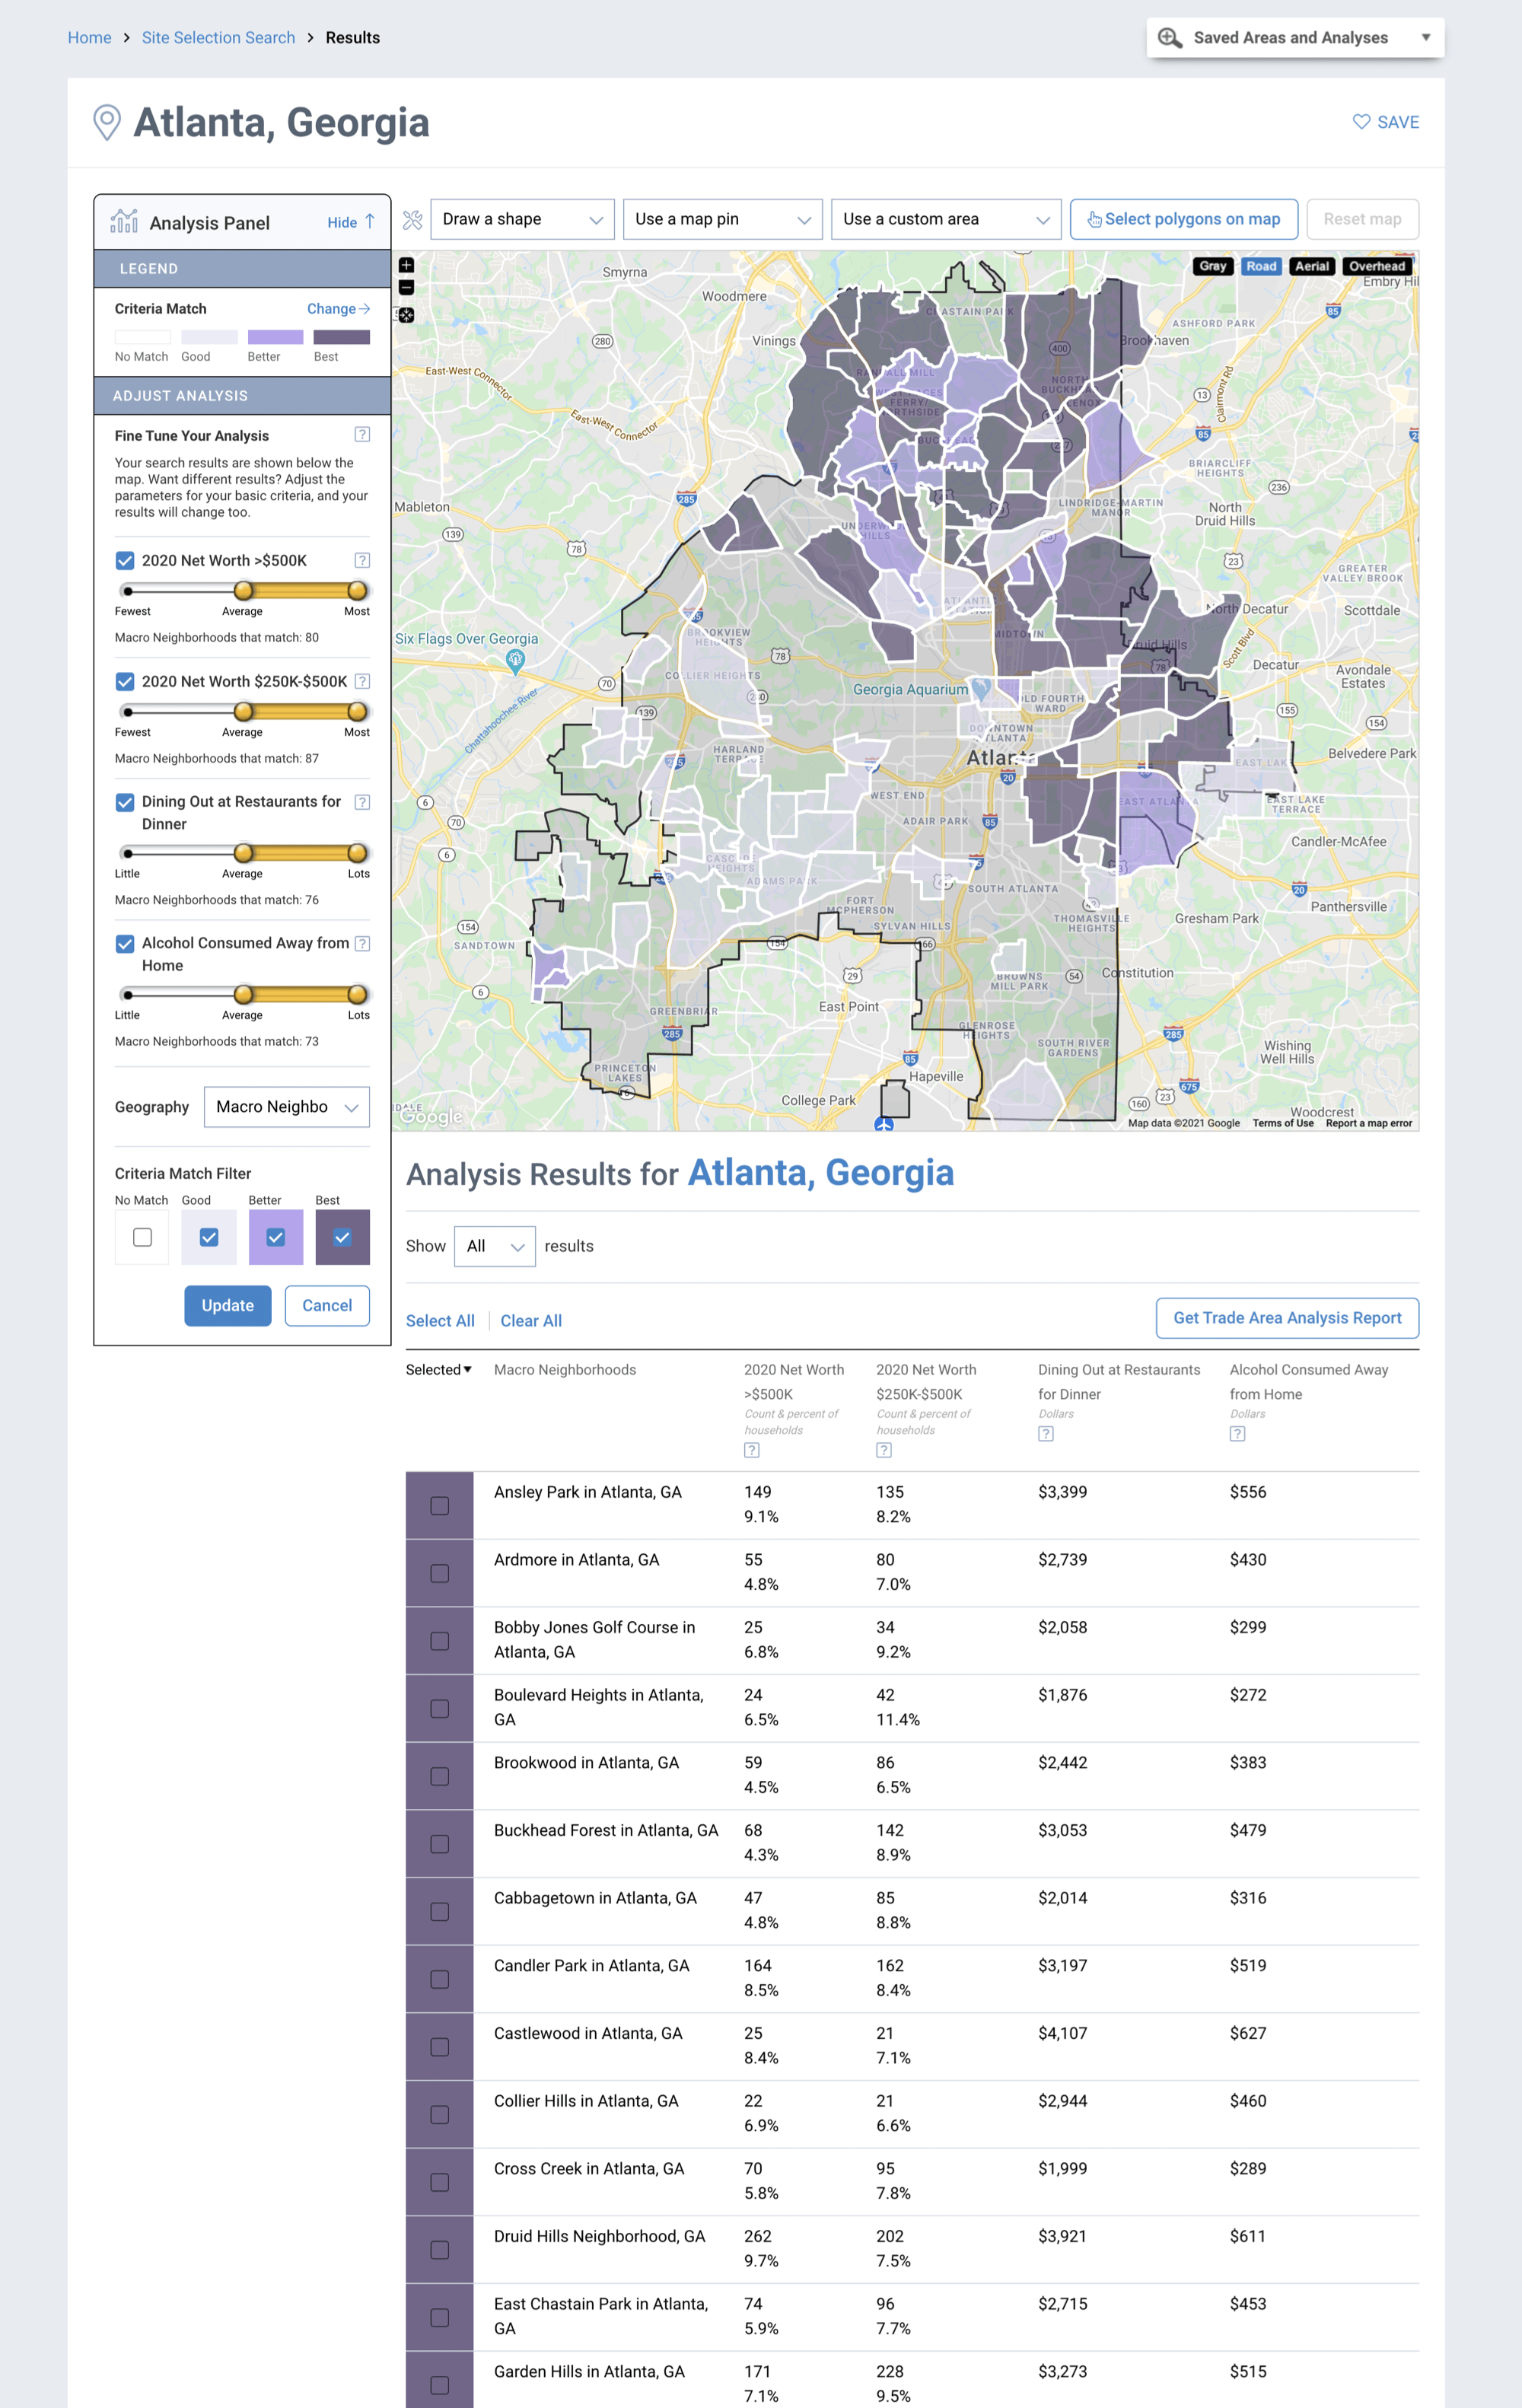
Once you select Run Analysis, you’ll be directed to the analysis results panel, showing the best trade area matches in the darkest purple color. Click on the geography pull-down menu on the left panel and select your geography. You’ll see areas that are the best match.
If you plan to include the site selection process in your presentation for a client, you can go ahead and generate the report by clicking the Get Trade Area Analysis button. Once back on the site selection results you can select all of the best geographical matches and perform a search.
This type of search helps you in your site selection process based on spending habits as well as current and projected economic and demographic conditions.
See Site Selection in action
Seeing these steps unfolded visually is highly recommended. Just watch this step-by-step video walkthrough: RPR Commercial Site Selection. It will take what might seem like a complicated process and break it down and simplify it for you.
Also, be sure to subscribe to the RPR YouTube Channel. It’s an easy way to learn more about RPR features and tools, and stay current on updates and improvements.
Share This Story, Choose Your Platform!
Related Posts


TOPICS
AUDIENCE
CATEGORIES


TUTORIALS & GUIDES
SUCCESS STORIES
PROSPECTING
THE PODCAST
