RPR Commercial: A Simple and Solid way to Search for Properties

In two recent RPR (Realtors Property Resource®) Q&A articles with commercial practitioners, we noticed a theme: simplicity. Here’s what Dave Ferro and Stephen J B Davis had to say about NAR’s commercial property data platform:
“RPR really simplifies my search. I go to RPR Commercial to save time and simplify.”
–Dave Ferro, REALTOR® , Watson Realty Corp. REALTORS®, Gainesville, Florida
“I use RPR because it’s really simple for getting solid info on a particular area. It’s just so easy to get super specific data! Right down to the zip code and neighborhood level.”
–Stephen J B Davis, REALTOR®, SJBD Land and Homes at Keller Williams Bluegrass
Successful commercial agents like Dave and Stephen know that RPR Commercial is a one-stop-shop for listings and research. In fact, RPR makes it possible for users to see on-market and off-market properties in one place—no matter which listing partner they use.
Strategic listing and data partnerships
RPR has worked diligently to bring everything a commercial practitioner needs to one central spot. Streamlining workflows, giving easy access to data and providing useful commercial tools in one hub can certainly work to your advantage and make you more efficient and productive. And having big league data partners goes a long way in making all of the above happen.
RPR’s partnerships with Biproxi, Brevitas, Crexi, Land Broker COOP, Officespace.com and TotalCommercial.com to name a few, let you search more than 864K+ active commercial listings.
For prospecting, RPR offers 57 million off-market properties around the country, which includes owner info for easy contact opportunities. Plus, strategic data and software integrations with Valuate® for calculating the return on investment, and Esri for rich economic and demographic statistics.
Here’s how to get started with your simplified search tool…
RPR: your simplified commercial search tool
First, visit RPR at www.narrpr.com and set the toggle to “Commercial” and begin your property search by entering a specific address, APN, or listing ID in the location field to go directly to the property. If you’re searching by multiple APNs or Listing IDs at one time, use a semicolon to separate each. In this case you’ll be taken to search results displaying each property.

You may also find that using the Commercial Map Insights found by selecting “Research” from the main navigation is a good way to look for land.
Search areas vs specific addresses
You can also search for properties in a general area. To do that, you’ll need to make sure that you have the correct “Filters” set. RPR will remember your last filter setting, but it’s a good idea to make sure they’re still set properly before beginning your search. You can also quickly remove previously set Filters by selecting the More Filters icon, you’ll see it in the upper right navigation menu) and then the Reset button.
Next, enter a neighborhood, ZIP code, city or other defined geography into the location field. As you type, RPR will auto suggest results, based on the location nearest to you. If you select the name of the auto suggest, your search will automatically be executed.

Funnel down your commercial search
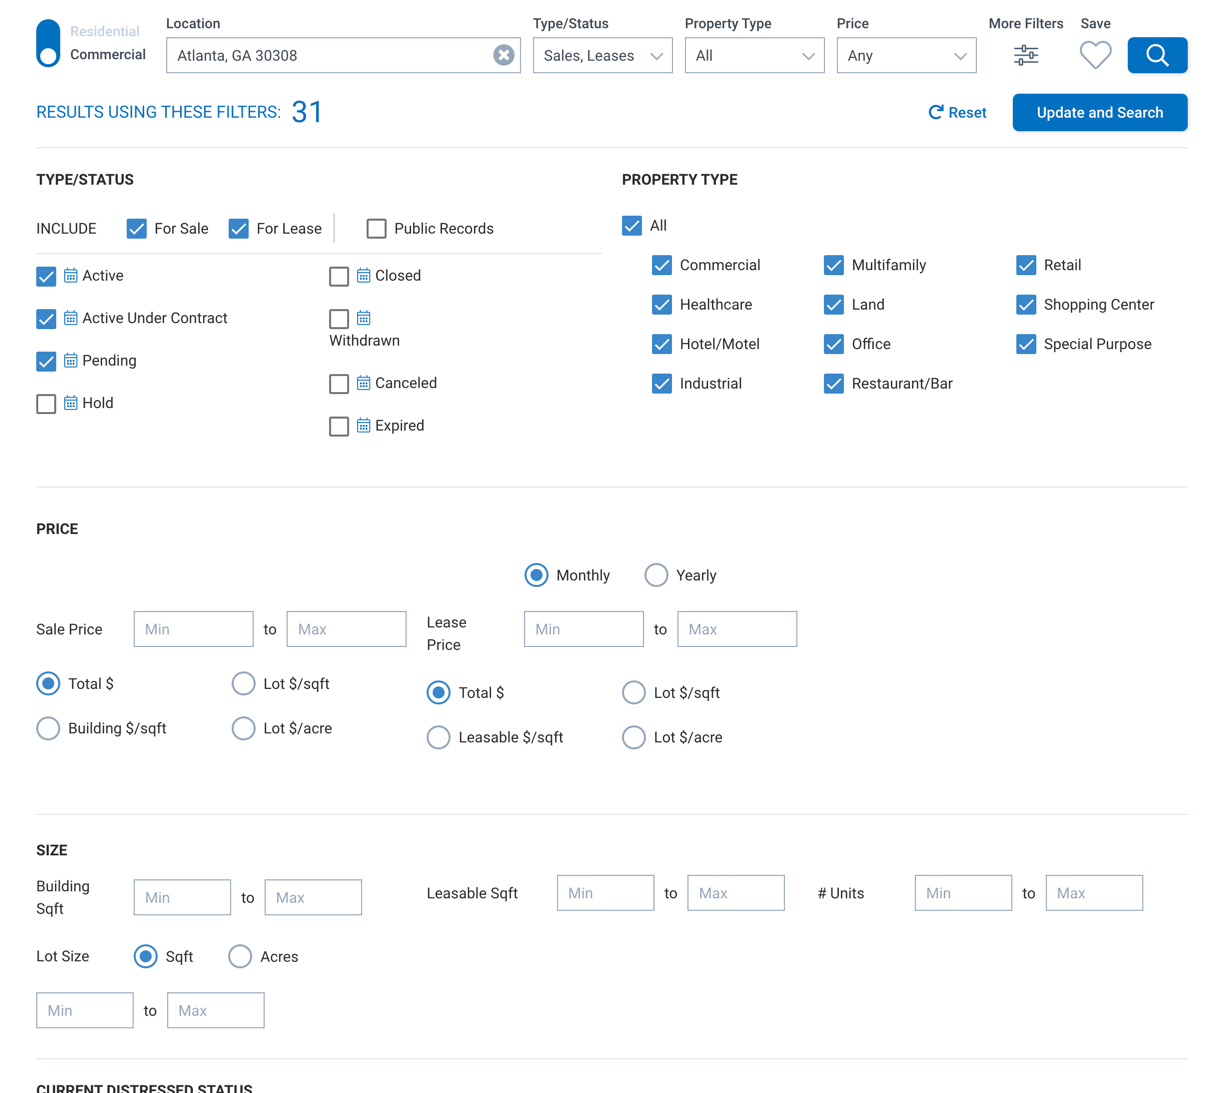
If you started searching without any filters, or have too many results, you can now narrow down your results by selecting the type / status for your search. For example, drill down by selecting properties that are For Sale or For Lease or Active Under Contract. You can even choose Off Market Public Records. Each status has a corresponding calendar that can be used to set the date parameters that will restrict your search to that exact time period.
One helpful tip as you are learning how agents in your market prefer to list properties, is to keep the “Commercial” property checked as this is a catchall property type and can house a mixture of properties that you may be interested in. Select your Price or Lease Price and enter the building or leasable square footage parameters and/or enter the lot size.
Note that RPR features a mobile responsive design. This means that the layout will adjust based on screen size. For smaller screens, some search options are moved to the “Filters” area.
Select the filters icon to expand the advanced search. You’ll immediately see the count of properties matching your criteria. This is a helpful reference that will allow you to better pinpoint the specific properties you’re looking for.
Pro Tip
Advanced search filters include distressed actions, land use, and miscellaneous fields such as occupancy type, owner name, year built, time owned, and keyword search.
Search results: List View
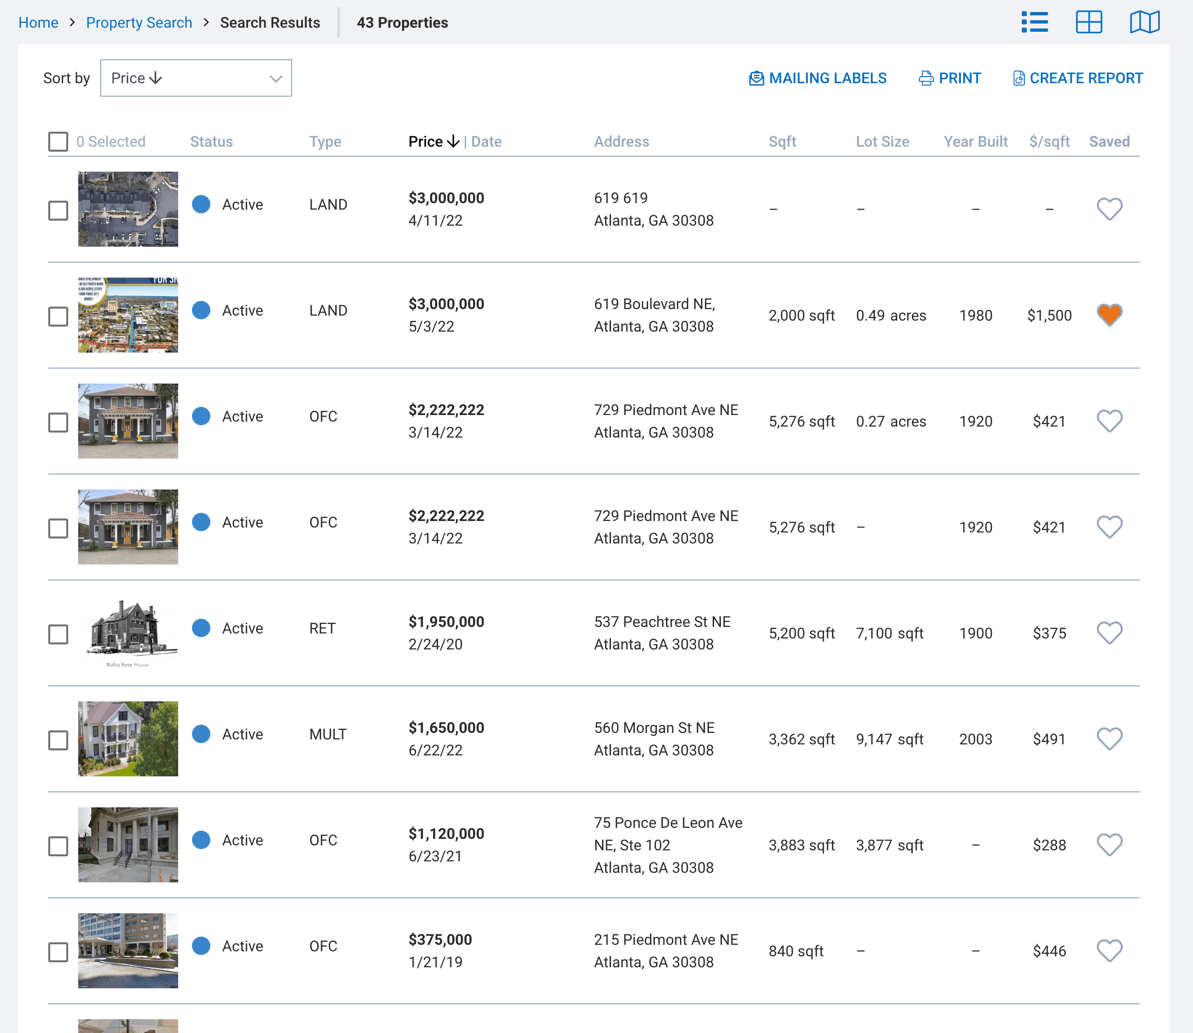
Now that we’ve gone over the basics of searching, let’s move on to property search results. Choose List View to arrive at your results (the first set of icons in the upper right). To continue narrowing down your results, select the Filters icon and adjust the parameters of your search. You can also sort your results by clicking the Sort By dropdown or one of the column headers.
From the List View you can also save properties by clicking the heart icon (all the way to the right of the column). The property is automatically named after the street address, but you can type a new name if desired. Then select Save and the property will be added to your saved properties. Your Saved properties are listed on the homepage, or you can access them from the top navigation by choosing My Work and My Saved Properties.
Printable View
If you’re looking for a printable view of the search results, select the properties you want by using the corresponding checkboxes and then selecting Print. A window will open allowing you to print Only Selected Properties or All Results. Note: selecting All Results will print the properties currently showing on your screen. If you have a large number of properties to print, make sure to scroll to the bottom of the screen to view all your results.
From this results list you can also create mailing labels or similar data to export into a CSV file, which is great for importing building and owner details into your customer relationship management system. Do that by selecting Mailing Labels from your results and then walking through the onscreen prompts. You can also go straight to creating a report, by selecting Create Report.
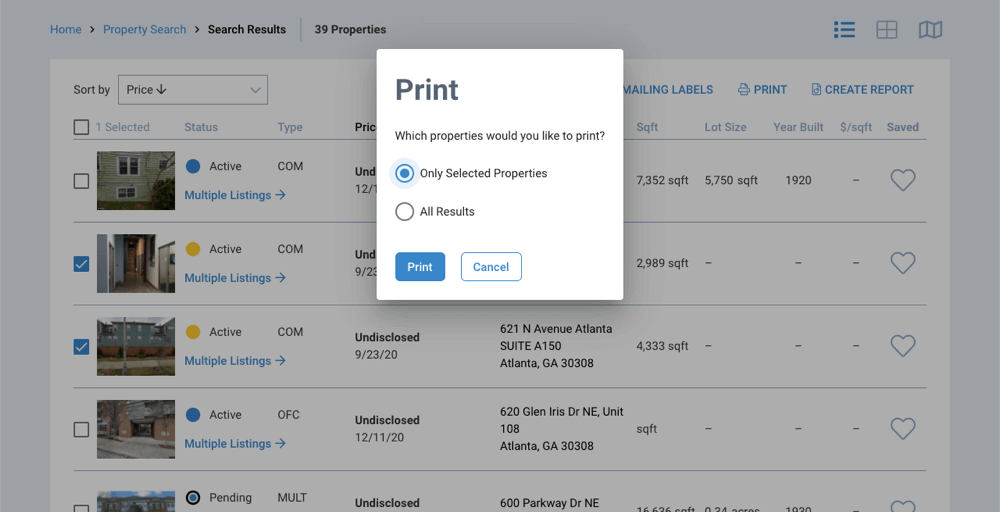
Photo and Map View
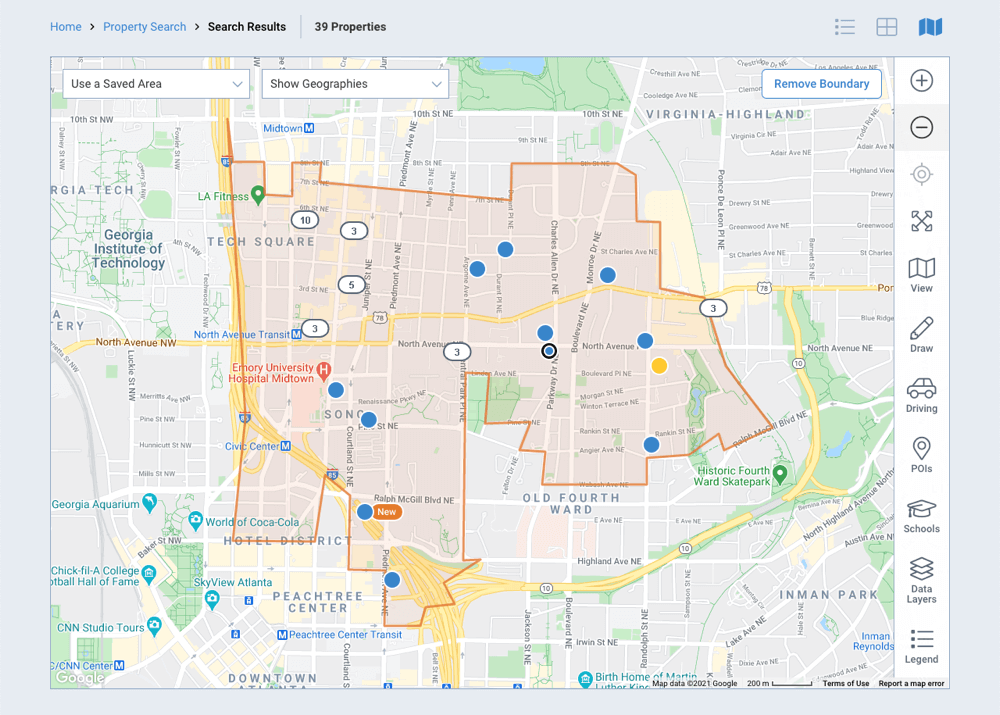
There are also other options for viewing your results. You can change to a Photo Grid View or to the Map view by selecting those icons (in the upper right). The Photo Grid View gives you a way to view larger photos of the property. And the Map View allows you to further define your areas by drawing them on the map, or by displaying the outlines of geographies such as neighborhoods, ZIP codes, Opportunity Zones and more. (We cover that in more detail in this Commercial Maps article.)
And finally, once you’ve found a property that you want to review further, select it to view the full property details.
RPR Commercial: keep it simple and solid
It’s no wonder commercial agents are talking about how easy RPR is to use and how the tools and property reports make them look so smart to their clients.
The insight you gain from RPR Commercial isn’t just a hunch; it’s tried, true, hard data that can help you deliver recommendations that get results and ROI.
Visit narrpr.com today to learn more.
Share This Story, Choose Your Platform!
One Comment
Leave A Comment
TOPICS
AUDIENCE
CATEGORIES
TUTORIALS & GUIDES
SUCCESS STORIES
PROSPECTING
THE PODCAST




[…] RPR Commercial: A Simple and Solid way to Search for Properties […]