Commercial Reports

If you’re looking to send something to your commercial clients that will really “wow” them, look no further than RPR Commercial Reports. In this article we’ll look into each type of Commercial property report offered, and then take a closer look at how to customize what’s included in those reports.
There are various ways to create a report in RPR Commercial. To get started, access the reports generation page by clicking the Reports link visible anywhere on the site and selecting the report you want to generate, or by following the Create Report button on the Search Results.
You can also do this on the Property Details page or the Get Trade Area Analysis Report on the Site Selection Results pages. You can also find a direct link to creating a report on your selected area of the map as well as on the Trade Area details page.
RPR reports can be created, saved, emailed, printed and even shared on Facebook directly from your desktop or your Android or Apple devices. Since reports are in PDF format, you can even share them to other networks such as LinkedIn. And best of all, you get to choose what is and isn’t included in every report you generate.
3 types of reports to choose from
RPR has three different types of Commercial reports to choose from: the Commercial Property Report, the Trade Area Report and the Trade Area Analysis.
PRO TIP
Customize your deliverables
Now that you know a little about each report, let’s review tips for customizing your reports.
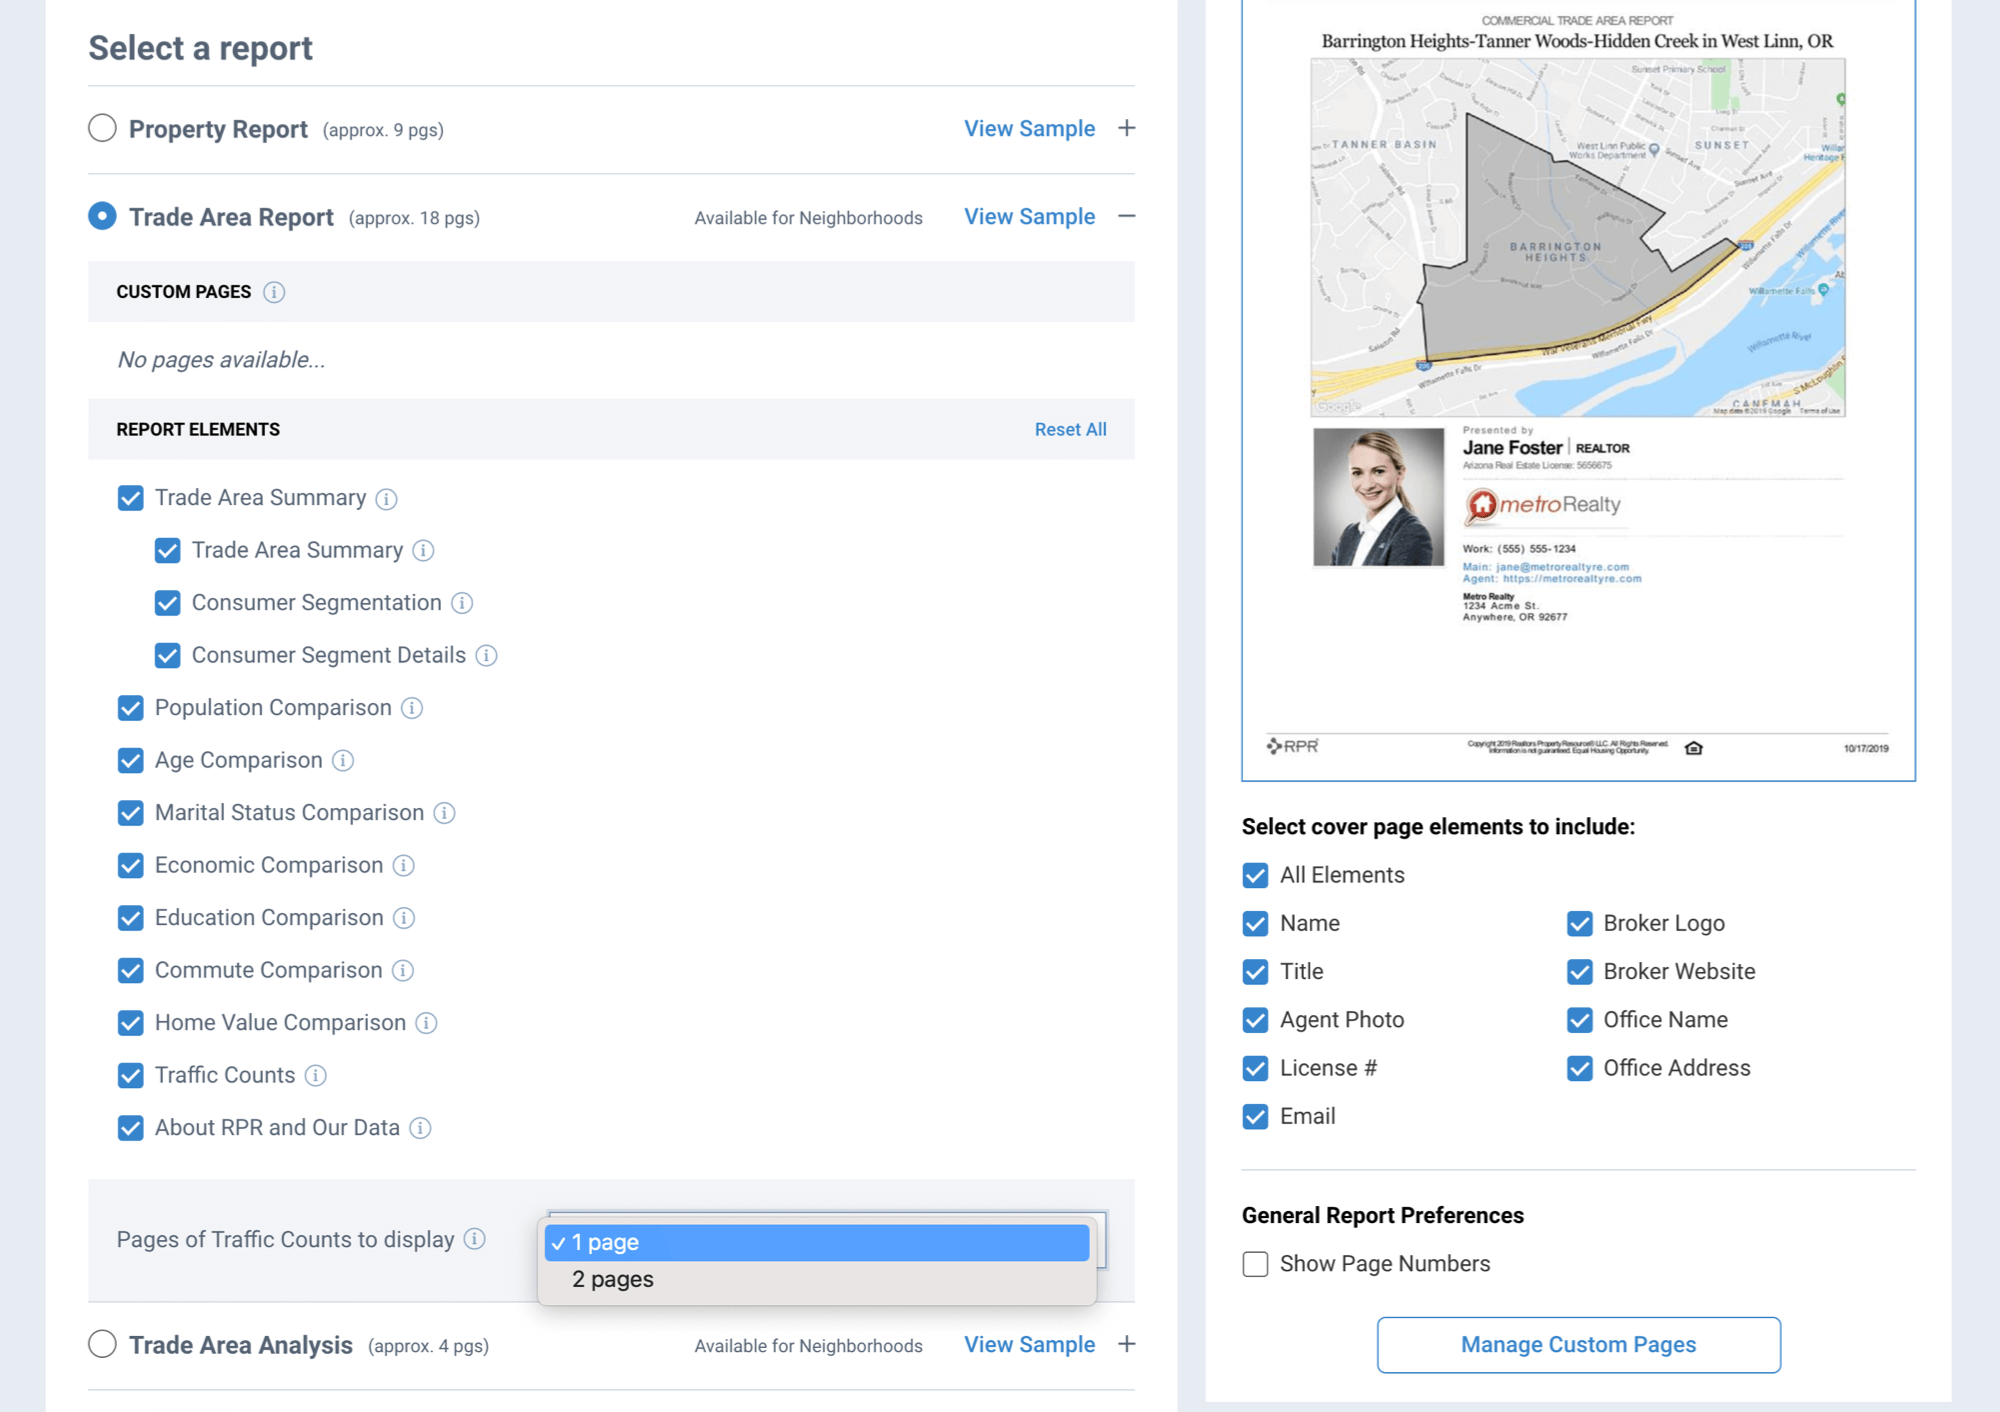
To select a report, choose the radio button for the corresponding report you want to create (that’s the little circle button next to each of the three report selections).
Select the plus sign (it’s just to the right of View Sample) to display all of the elements included on the report. If you are unsure about what something represents, move your mouse over the “i” and you’ll see a preview of that particular element. Un-select the checkboxes to remove the elements you do not want to include and the system will remember those selections for next time.
The cover page elements can be customized for all reports on the right side of the screen. Choose what you want included or omitted on your cover page, including page numbers. This can be particularly helpful if you’re going to include the RPR report with other materials such as a company overview or marketing strategy for a seller.
Add custom pages
You also have the ability to insert your own PDF pages into any of your RPR reports, or include PDFs uploaded by your brokerage.
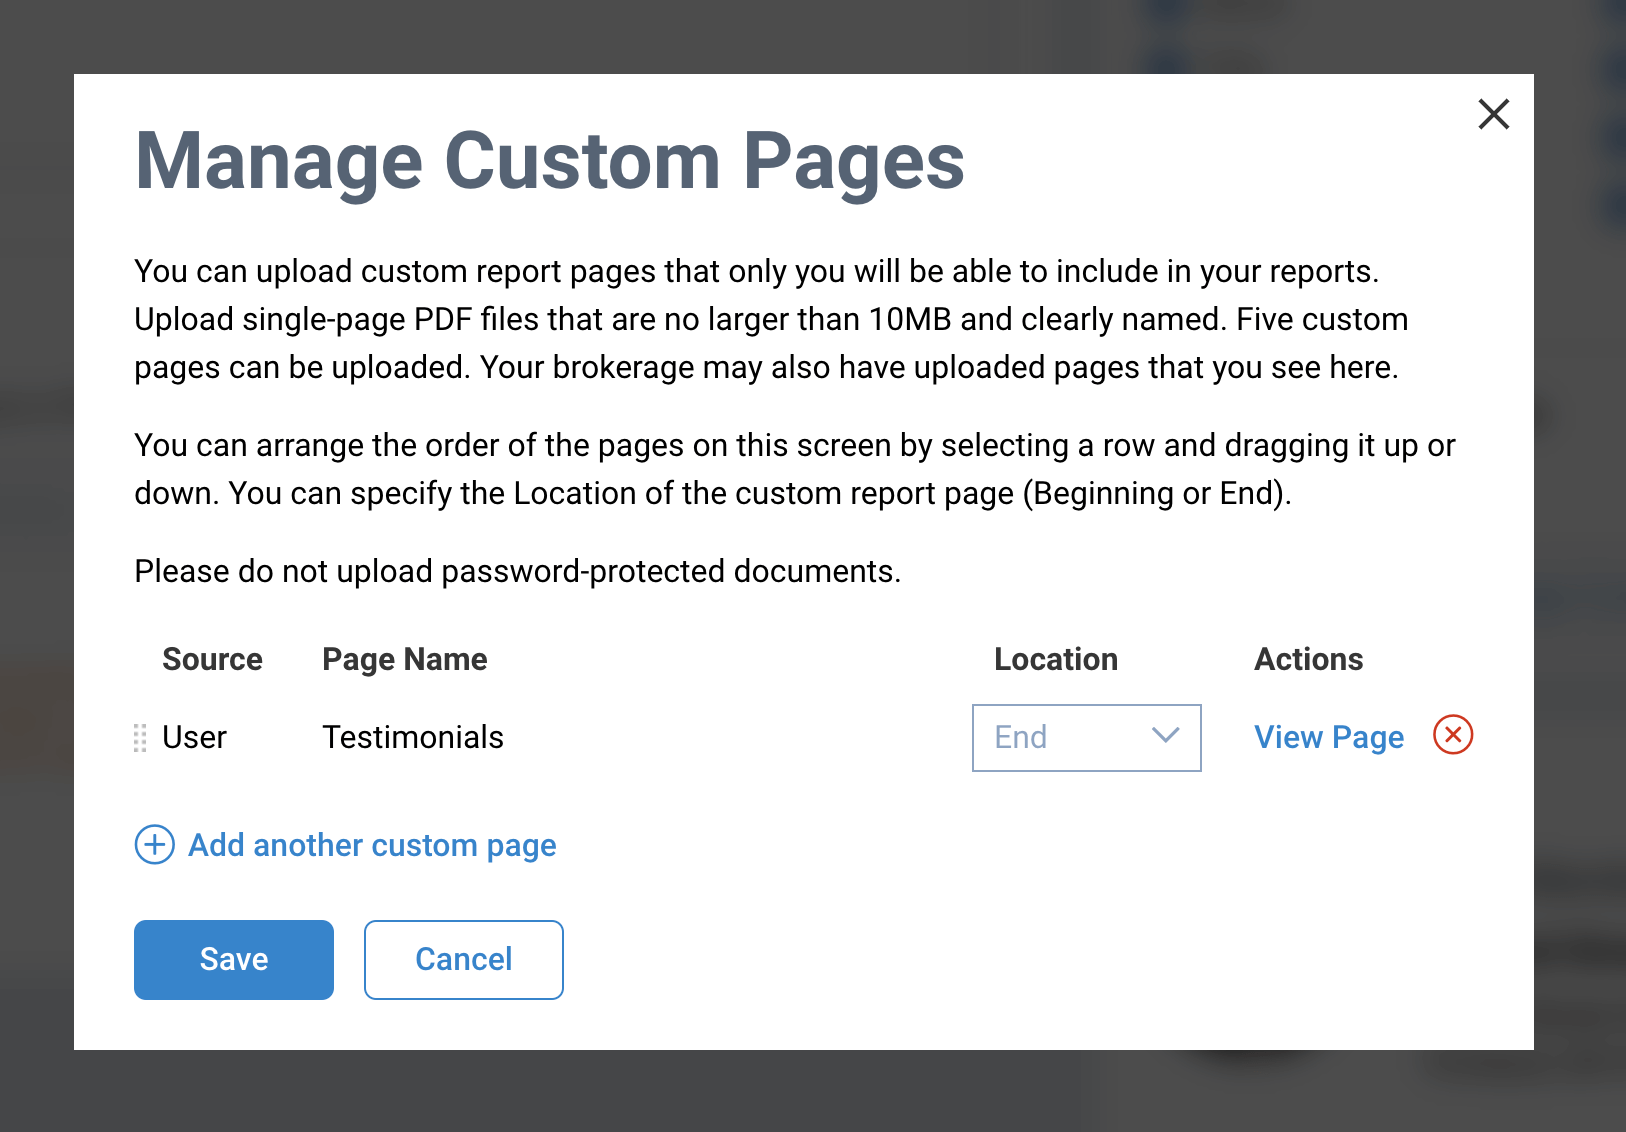
Under General Report Preferences on the right side of your screen, select Manage Custom Pages. A pop-up will appear, allowing you to add up to five customized PDF files. You might include a page containing your biography and other professional information for your clients to see in their report. This is also an excellent way to showcase testimonials, include one of the NAR research reports, add your investment analysis performed with Valuate, or a marketing plan and methods you plan to employ for your client.
Select Add custom page to upload PDF files from your system. You can upload a max of 5 PDFs that are no larger than 10MB. It’s best to clearly name these files for future use. Arrange the order of the pages by selecting a row and dragging up or down. You can specify the location of the custom report page to be at the beginning or the end of your report.
Once complete, add your custom pages to individual reports under the plus sign dropdown. Select or unselect custom pages you wish to be included. Your selections are saved for any future reports you run, but you can change them at any time.
Run Report
The final steps are to personalize your report, if you choose, and select your delivery method: either PDF or email. Click Run Report. The reports you generate will appear under My Reports at the top of the Reports page. Reports will remain in the list for 30 days, after which time they are automatically deleted.
If you click on the dropdown below the generated report, you can choose from several options with which to manage your reports, including delete the report, re-download the report, rerun the report, and share the report on Facebook.
And that’s a wrap on RPR Reports. As you can see, they can really help you make a positive impression on your clients. Don’t hesitate to create one and send it out or share it.
Also, be sure to subscribe to the RPR YouTube Channel. It’s an easy way to learn more about RPR features and tools, and stay current on updates and improvements.
Share This Story, Choose Your Platform!
2 Comments
Leave A Comment
TOPICS
AUDIENCE
CATEGORIES
TUTORIALS & GUIDES
SUCCESS STORIES
PROSPECTING
THE PODCAST






As what is good for the gander is good for the goose, why not let good old Ephraim Inoni benefit from this very same largesse? His account published a few days ago should pay off his debt without much loss of sleep.
I believe this is a great site, you are working great on the content and quality of this site at the same time.